Everyone has different preferences, goals and attitudes about hiking and climbing mountains. I'd like to get your thoughts on a handful of topics. Please take a few minutes to complete this short, 5-question survey.
Thank you!
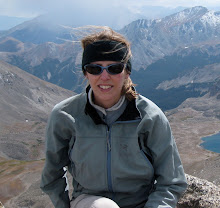
Sarah
July 28, 2009
TrueSummit Survey
July 24, 2009
Crestones - One Down, One to Go
Last weekend we started our run of the final fourteeners on our list with a backpack into South Colony Lakes and an attempt at the Crestones.
The Peak was a great climb, with the exception of a large group above us who sent a near-continuous (and totally unnecessary) volley of rockfall down on all the climbers below them. Here's a view of the route from part-way up the Red Gully:

By the time we re-climbed Broken Hand Pass it was too late to attempt the Needle. We were also out of water and beat. We'll be back in September to take care of that unfinished business.
Skipping the Needle left us with enough energy to rise at 3:00 a.m. on Sunday and shoot up Humboldt in the dark, arriving on the summit just before sunrise:

We were back at the tent around 7:00, on the trail before 8:00, and enjoying a couple IPAs at the car by 10:30.
Missing the Needle shouldn't derail our plans of finishing this year, but we don't have much room for error. Our remaining peak list / itinerary looks like this:
- Snowmass (this weekend)
- Pyramid
- Culebra
- Blanca / Ellingwood
- Little Bear
- Maroon Peak
- El Diente
- Sunlight / Windom / Eolus
- Wilson Peak / Mt. Wilson
- Capitol
- North Maroon
- Crestone Needle
- Sneffels
No place for a nervous person.
The only peak that truly concerns me is Little Bear. Having no personal control over rocks shooting down at my head is a frightening prospect. The others I think I can handle, but it will be a true test of physical and psychological fortitude.
Here's a parting shot of the Needle... see you in September:

July 14, 2009
Trailhead Access - The Good, the Bad, and The Lake Como Road
Whoever said that getting there is half the fun has never taken a white-knuckle drive down one of Colorado’s mountain roads.
Accessing fourteener trailheads can be problematic, to put it mildly. Many of the standard routes begin at the end of 4WD roads, some of which are exceedingly rough and not passable with your standard Explorer or Pathfinder.
Which is why I’m proud to say I’ve climbed all of my 14ers so far with a lowly Honda Civic.
Using a car with pitifully low clearance has probably added close to 100 miles to my total hiking distance, but I’ve decided that fuel efficiency outweighs the extra foot travel. Plus, road-walking builds character!
I’m living proof that you don’t need an SUV to climb the fourteeners. But I’d be amiss if I didn’t warn you that not having 4WD will make for longer hikes.
The roughest road in Colorado (probably in the entire US, for that matter) is Lake Como Road, which leads to Blanca, Ellingwood and Little Bear. It's so rough you'd have to be crazy to take any sort of motorized vehicle up it.... not that it stops people from trying:

On the other hand, some 4WD roads go so far up the mountain that you can barely call the remaining route a climb. For example, the road on Mt. Antero tops out at over 13K. And you can drive a 4x4 up to 12,700' on Castle Peak.
When planning a hike, be sure to consider whether your vehicle can safely make it up the road to wherever you intend to start. You can check trailhead conditions on 14ers.com. When in doubt, allow extra time for potential road walking.
Finally, while I’m determined to finish the fourteeners with my trusty Civic and refuse to accept rides as a matter of principle, you can take comfort in the fact that it’s fairly easy to bum a ride in some kind soul’s FJ Cruiser if you want to cut down your distance.
July 13, 2009
Mountaineering Safety - Avoiding Accident & Injury on the Peaks
Climbing mountains is not a risk-free activity. Just this past weekend, a climber from Colorado Springs was killed on Capitol Peak, a 14er near Aspen.
Tragic accidents like these happen every year. You can sift through an extensive history of Colorado mountaineering accidents on listsofjohn.
If you’re going to climb, you must be willing to accept some level of risk. But that doesn’t mean you shouldn’t take every possible precaution to keep yourself safe.
I can’t cover every aspect of mountaineering safety in one post. Instead, I’ll cover some of the main hazards, give a few tips on how to avoid them, and point you to more extensive resources.
Avalanches – Snow can remain on the high peaks well into June, with some areas holding snow year-round. Avalanche danger is always a risk, particularly in spring and early summer.
Some tips:
- Add the Colorado Avalanche Information Center (CAIC) to your bookmarks. The site provides backcountry avalanche condition forecasts, updated twice daily.
- Take an avalanche awareness course. Most REI stores offer several class throughout the year. Find one near you on REI's online store locator and click on Classes, Events and Presentations for a schedule.
- If you venture out in winter or spring, carry avalanche gear: beacon, shovel and probe. (Note that this equipment is useless unless your partner has the same gear.)
Getting Lost – The easier fourteeners have well-defined trails, and you’ll have plenty of people to follow if you’re hiking on a summer weekend. But many of the harder peaks require good route-finding skills.
Some tips:
- Always carry a map and compass (and know how to use them). A GPS can be helpful, but isn’t a replacement for map-and-compass orienteering.
- In case you do get lost and are forced to spend a night out, carry emergency food, matches and extra clothing. A lightweight bivy sack like this one is also a good idea.
Rock Fall – Many of the more difficult fourteeners have loose rock. Not only do you want to avoid being hit, you also need to avoid sending rocks down on climbers below you.
Some tips:
- Wear a helmet.
- Climb routes that are known for rock-fall during the week.
Lightning – Refer to my July 8 post on The Art of the Alpine Start.
I’ve already recommended Freedom of the Hills, but I’ll plug it again here as a must-have resource. Reading this book will give you the knowledge you need to travel safely in the mountains, but remember that there’s no substitute for actual experience.
July 8, 2009
The Art of the Alpine Start
I'll be the first to admit that I'm not a morning person. But I've come to accept the fact that my peak-bagging habit requires me to rise early on the weekends.
The practice of departing for a climb before dawn or at first light is known as getting an "alpine start." As unpleasant as it may seem, hitting the trail very early is the only way to avoid afternoon thunderstorms.
Thunderstorms are simply a fact of life in the high country, particularly in the summer months.
For a good overview of weather patterns in the high country, check out the "Consider the Weather" section in this article on the Colorado Fourteeners Initiative (CFI) website. It explains that the storms we experience in Colorado from June through September are caused by rising warm air masses and can bring heavy rain, hail, and lightning.
No one likes to get caught in the rain or hail. But the real danger is lightning.
According to the National Weather Service (NWS), lightning has killed an average of 58 people per year during the past 30 years – more than either tornadoes or hurricanes.
This page on the NWS website offers tips on avoiding thunderstorms and treating lightning strike victims. Key takeaway: Seek shelter!
Choose your start time depending on the distance of your hike (also taking into consideration your average speed on the trail). The standard rule of thumb is to be off the summit by noon. However, in my experience, it's best to be back below treeline by noon.
It's very easy to get "summit fever" and push on when you know the weather is rolling in. I've done it myself, on the Atlantic-Pacific-Crystal trifecta of top 100 peaks.
The black clouds looming overhead in the photo below turned into an electrical storm that literally had my hair standing on end. I made it down safely, but not without taking far too great a risk.

July 6, 2009
Difficulty Ratings - Choosing Your First Fourteener
Now that you know what to eat, drink and carry, it's time to make the big decision: Which peak to try first? You’ll obviously want to start with one of the easier fourteeners, but keep in mind that “easy” is a relative term here. All of Colorado’s highest peaks are physically demanding, but the technical difficulty of their standard routes varies dramatically. Difficulty Ratings The most commonly used rating system for climbers is the Yosemite Decimal System (YDS), which identifies five “classes” that range from walking a trail to scaling a sheer rock face. The following article on outdoorswithdave.com provides a good overview of the YDS: Class 1: Walking, on an established trail. Class 2: Hiking, up a steep incline, possibly using your hands for balance. Class 3: Climbing up a steep hillside; a rope is not normally used. Class 4: Exposed climbing, following a ledge system for example. A rope would be used to belay past places where a fall could be lethal. Class 5: This is where technical rock climbing begins. I agree with most of these assessments, but can offer a bit more detail based on my experience. Class 2 is often used to describe a route without a defined trail. You might be hiking over talus (large pieces of broken rock) or scree (smaller pieces of broken rock). Here is an example of class 2 terrain on Antero: To me, class 3 involves a lot more than “climbing up a steep hillside.” The class 3 routes I’ve done (Longs, Wetterhorn, Lindsey) required me to use my hands for a good portion of the route. Foot- and hand-holds were easy to locate, but it wouldn’t have been possible to simply “walk” up. Here is an example of class 3 terrain on Longs: I’ve only had a tiny taste of class 4 so far. In my limited experience, the main difference between class 3 and 4 is the availability of holds. The consequences of a fall on class 4 terrain would also generally be greater than on class 3, but the exposure and relative danger of a climb isn’t necessarily correlated to its class rating. However, contrary to the outdoorswithdave article, most people don't use rope on class 4. So when you’re choosing your first fourteener, look for class 1 or 2 routes and shorter hikes with less elevation gain. In my opinion, Bierstadt, Sherman and Quandary are the easiest. To see how all of the fourteeners stack up, check out this guide on 14ers.com. 

4th of July Double - Mt. Lindsey + Huerfano Peak
This past weekend I had a little lesson in mountaineering safety, which complements my other post today on difficulty ratings.
The standard route on Mt. Lindsey is rated 2+ and involves climbing up a scree-filled gully that holds snow until mid-summer. We climbed the peak on Saturday after hiking up Forest Road 580 Friday night (our Civic couldn't make it up) and setting up camp.
Rather than take the loose gully and flirt with the rotten band of snow in the middle of it, we skirted to the right and found a more solid class 3 route, as shown in this photo:

The safety lesson was learned by observing other climbers. Even though Mt. Lindsey is notoriously loose and steep, the other four people we encountered on the mountain were not wearing helmets.
I strongly recommend a climbing helmet for any route with rock-fall potential, and for any climb rated class 3 or above. This is an $80-$100 purchase that could save your life!
We also managed to tag Huerfano Peak, a Centennial 13er just 0.6 mile from Lindsey. The extra summit made for a 13-hour day (including the 6-mile backpack out), but was well worth it.
On a final note, I have to admit that I failed to heed my own advice on adequate hydration. I ran out of water on the summit of Huerfano. The next four miles and 4,400 feet of elevation loss were brutal, as I fantasized about an ice cold glass of tart lemonade.
Another lesson learned: Take 10 minutes to filter more water!
-Sarah
July 1, 2009
Hydration - The Best Cure for Altitude Sickness
Now that you know what to eat, let’s talk about what to drink on a fourteener hike.
This one’s easy: Water. Lots of it. Mix in a little Gatorade powder if you like, just keep the fluids coming.
In my essential gear post, I suggested using a hydration bladder. I’ll reiterate that here – drinking from a hose that’s easily within reach is far easier than fumbling for a water bottle.
How much water is enough? It varies depending on the temperature, the distance you’re hiking and your own physical needs. A good baseline for an “average” fourteener route (6-8 miles, 3,500 feet of vertical) is two liters.
Acute Mountain Sickness
Hydration is important in any physical activity, but it’s critical at elevation. That’s especially true if you’re coming from sea level.
Acute Mountain Sickness (AMS) is a very real possibility at 14,000 feet. Many people actually get it at much lower elevations.
According to the Institute for Altitude Medicine (IFAM), AMS “feels exactly like a bad hangover.” Nausea, headache and fatigue are the most common symptoms. This page on IFAM’s website offers more information on the causes, prevention and treatment of AMS.
Adequate hydration can be an effective way to prevent AMS. Sleeping at 6,000 feet or higher the night before a climb can also help. However, once the symptoms set in, the only real cure is to descend to lower elevation as quickly as possible.
June 29, 2009
Mount Ouray - Sawatch Centennial
Last week, I posted about the solitude I enjoyed on Chiefs Head in RMNP. On Saturday, I climbed another less-traveled peak.
At 13,971 feet, Ouray is almost a fourteener. But with Colorado summits, “almost” doesn’t mean much. As a result, Ouray is much less popular than the higher peaks in the area (being in the Sawatch Range, Ouray has lots of 14,000-foot neighbors to compete with).
Still, Ouray is a notable summit and a worthwhile climb. It’s a Centennial – one of the top 100 peaks in Colorado. You can read more about the peak on its profile page on Summitpost.org.
The hike was supposed to be short and easy (we took the 6.5-mile West Ridge route) but ended up being more challenging than expected. It was quite steep, with no trail to speak of, and the final 1,000-foot ridge was a sporty scramble on rocks that were slick from recent rain.
Add to the mix some very unstable weather (see photo below), and Ouray turned out to be a pretty tough day! It was a good reminder that one should never underestimate the mountains.
Fourteener Fuel - What to Eat on Summit Day
Hiking a fourteener burns a lot of calories.
The actual number of calories you burn will vary depending on which peak you’re climbing, how much you weigh and a lot of other factors. But it’s safe to say you’ll need to eat a lot more than you would on a flat trail at sea level.
According to this article on Backcountry.com, “hikers, climbers and others traveling with packs over difficult terrain will need at least 500-1,000 more calories than they normally would.”
If you like to eat, you’re in luck.
Nutrition is important, and getting the right balance of carbs, fats and protein will certainly lead to better performance on the mountain. But in my experience, the key is to eat foods you like and that will still be appealing when altitude zaps your appetite.
Here’s a quick list of my favorites:
- M&Ms
- Nuts
- Peanut-butter & jelly sandwiches
- Fig Newtons
- Crackers
- Larabars (All-natural energy bars that actually taste good, made right here in Colorado. Read more about the company’s founder on their website.)
You’ll want to customize the list according to your own tastes. Anything goes - I've seen people eating avocados and cold Big Macs on summits. Just avoid anything that might melt and bring more than you think you’ll eat.
Also take special note of Principle #3 in the Backcountry.com article, which explains why you need to snack often. Aim for a couple hundred calories every two hours or so.
As for what to eat after the climb, may I suggest:

June 24, 2009
Essential Gear
I could talk all day about the best raingear, softshell jackets, and antimicrobial polypropylene base layers. I could discourse on the virtues of one pack’s internal frame construction versus another’s top-loader functionality.
But when it comes down to it, you don’t have to be outfitted in all the latest (or most expensive) gear to climb a fourteener. The only thing you absolutely must have are the 10 Essentials.
According to Mountaineering: The Freedom of the Hills (see more on FotH below), the 10 items every hiker should have on his or her person at all times are:
- Map
- Compass*
- Sunglasses and sunscreen
- Extra food and water
- Extra clothes
- Headlamp/flashlight
- First aid kit
- Fire starter
- Matches
- Knife
*Can be supplemented (not replaced) with a GPS
As long as you have these 10 things covered, your chances of survival are greatly enhanced. If you also prefer to be comfortable, here are a few general recommendations:
Pack – Needs to hold all of your 10 essentials (2,000-3,000 cubic inches for summer day hikes). Hydration compatibility (see #3) is a big plus. I’m currently using an Osprey Stratos 40 and I’m very pleased with it. It has a mesh panel that allows air to circulate down your back, which helps keep you cool and comfortable.
Clothing – This local Colorado blogger created a great page on what to wear in the high country. He explains why cotton should be avoided at all costs, evaluates various synthetic fabrics and gives recommendations for different seasons.
Hydration Bladder – Carrying a water bottle is a recipe for dehydration. You won’t want to stop, pull the bottle out of your pack and take a drink. The solution is a hydration bladder. It allows you to drink from a hose while you hike. Look for one that holds at least 2 liters.

Trekking Poles – Not everyone uses them, some people disparage them, but I personally wouldn’t hit any trail without them. Poles save a ton of wear on your knees and are essential for crossing streams or rocky terrain.
A few more words on Freedom of the Hills. It is the definitive guide for anyone thinking of getting into mountaineering. The book, which first came out in 1960 and is now in its 7th edition, provides detailed descriptions of everything from pitching a tent above timberline to proper ice axe technique.
While you may not use a lot of this stuff climbing fourteeners in the summer, it’s an excellent resource that will teach you how to be safer in the mountains.
-Sarah
June 22, 2009
Chiefs Head – A Rocky Mountain Classic
Some of the easier and more popular fourteeners see hundreds of hikers on summer weekends (check out this handy peak usage guide on 14ers.com to find out which peaks are most crowded). In fact, foot traffic on the peaks has gotten so heavy that a dedicated initiative was formed in 1994 to protect and preserve Colorado’s fourteeners.
If you’re looking for solitude, you may want to try one of Colorado’s lower-elevation peaks.
Rocky Mountain National Park (another place often associated with crowds) has dozens of peaks that see very few hikers. This past weekend, I climbed Chiefs Head, the third-highest peak in RMNP. My partner and I didn’t see a soul for the first 8 hours of the hike and had the summit all to ourselves.
(Side note: If you followed the Chiefs Head link above, you discovered Summitpost.org, a valuable resource for route information on just about any peak in the world.)
Part of the reason for the lack of crowds on Chiefs Head is its remoteness – the route we took from Sandbeach Lake is 16.4 miles and over 5,500 feet of elevation gain, more than half of it off-trail.
Realizing that afternoon thunderstorms must be avoided (especially during National Lightning Safety Awareness Week), we hit the trail at 4:00 a.m.
Sunrise at Sandbeach Lake was peaceful and a bit surreal:

We made the summit at about 10:00 a.m. The sun never did make an appearance…

The moral of the story is, don’t limit yourself to just the fourteeners! There are hundreds of peaks in this state that offer the same majestic views and physical challenge, without the crowds.
A great place to research what’s out there is Lists of John (click on Colorado Peaks by Elevation). You can view members’ lists of summits and add your own profile and peak list. The site is a great way to keep tabs on who’s climbing what in Colorado and track your own accomplishments.
And if you're interested in hiking in Rocky Mountain NP, pick up a copy of Lisa Foster's Complete Hiking Guide. In the book's preface, Foster explains how she set out in the summer of 2004 to "finish hiking every named destination in RMNP." The results of her quest are documented in the book, which covers 440 destinations and 668 trails and routes.
-Sarah
June 17, 2009
Preparation
It shouldn’t come as a surprise that hiking a fourteener is a considerable physical challenge. If you go by the 3,000 foot rule, you’ll be gaining at least 3,000 feet of elevation, usually at a rate of about 1,000 feet per mile. And once you’re above treeline, you’ll have about two-thirds the amount of oxygen as you’d have at sea level.You don’t need to train for your first peak like you’re preparing for a marathon, but you’ll have a better chance of gaining the summit if you've been getting some regular exercise. I’ve always felt that if you can run a mile comfortably, you can make it up a 14er.The best way to prepare for hiking a mountain is to get out and hike. Walking on a trail (preferably one with some ups and downs) will condition the muscles you’ll use tackling the high peaks. Getting in some good long treks will also help you build the endurance you’ll need to keep moving all day.If you don’t have access to any trails, go with activities that mimic hiking on steep ground. Walk on a treadmill with the incline maxed out. Better yet, do it wearing a loaded pack. The stepmill (scrolling staircase torture device… not available in all gyms) is another good option.For even more ideas and info, check out this article on hikingdude's blog. He offers some great suggestions for preparing your body and mind for a serious hike. Regardless of what you’ve done to prepare for your first fourteener, the most important thing to remember when you finally hit the trail is take it slow. We all move at a snail’s pace in the thin alpine air (well, except for these guys.) It’s better to go slow and steady than charge ahead and have to stop every five minutes. Plus, you get to enjoy the scenery:

June 16, 2009
Where to Begin?
When I moved to Colorado, I had climbed a grand total of 11 mountains. My peak list now stands at 113, including 35 over 14K. If you want to summit a fourteener, you don't need a special training regimen, fancy equipment or even rock climbing skills. All you need is a healthy respect for the mountains and the willingness to push your limits.
I'm still a beginner myself, but my blog offers helpful advice, resources and information for those who are just getting started on their fourteener quests or are planning their very first summit attempt.
If you've already searched for answers on the Web, you know there is a staggering amount of information out there. That's because so many questions arise when you're contemplating your first foray to 14,000 feet.... questions like:
What should I eat?
What should I wear?
Which peak should I do first?
How should I train?
Where can I camp?
Will I get altitude sickness?
Do the marmots bite?
I'll do my best to answer all of these questions by relaying my own experiences and providing links to the best info on the Web.
For starters, you may have already discovered 14ers.com. If you haven't, I recommend checking it out. The discussion forum is always active and is almost like an online community. You can find a lot of excellent advice from very experienced people, and it's also a great place to find partners. Plus there are lots of helpful resources, including route descriptions with photos, gear lists and trailhead information.
A copy of Gerry Roach's guidebook is also a must-have... it's the Fourteener Bible. Roach's route descriptions are concise and easy to follow and his commentary is fun to read.
Happy Climbing!
Sarah

Subscribe to:
Posts (Atom)